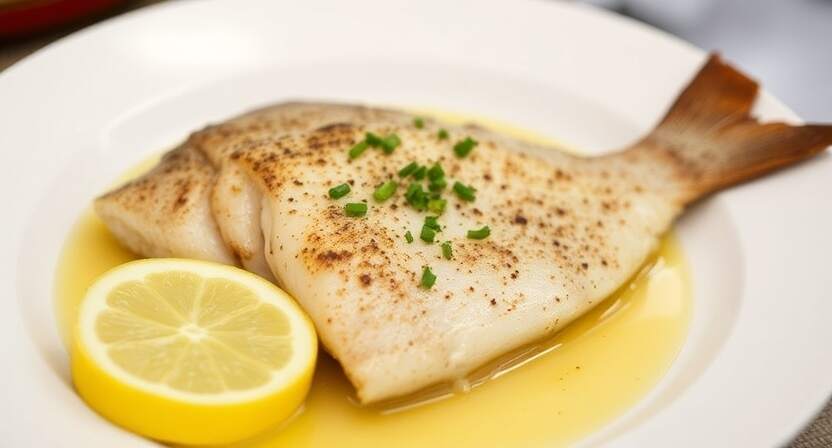
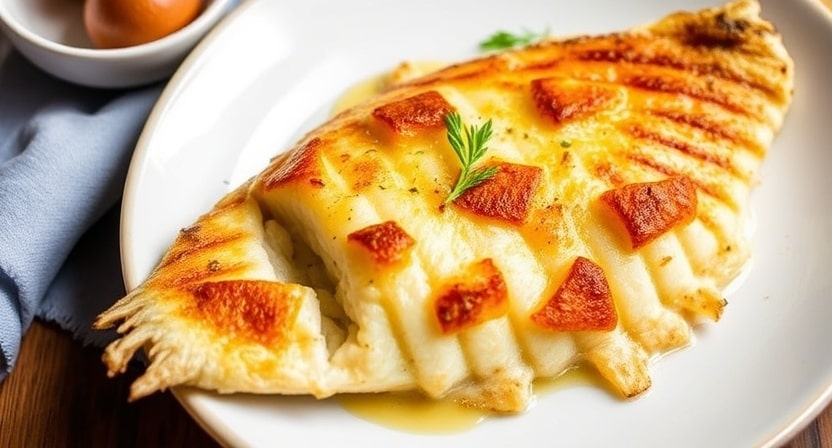
How to Cook Haddock! Three Lovely Methods

Best Carving Food Carving Fish and SeaFood Chicken Appetizer How to Cook Haddock Fish! Three Lovely Methods.. Knowing how to cook this fish is a total game-changer. All it takes is getting fresh haddock and learning how to prepare them. Haddock tends to be very tender, almost ‘raw’ in texture, and can dry out or become leathery hard when overcooked; hence keep that in mind when baking. Few Tips for Better Haddock Fish Cooking! Haddock fish tastes better when they are fresh and caught recently. You are supposed to let them soften in the refrigerator, with frozen haddock fish, instead of using the microwave in case you would like to keep as much texturized taste and quality. Don’t crowd: Do not let it get full either with the pan or the oven when cooking. In case you really want to broil, bake, or fry the fish, do so in a way that they are kept sufficiently apart so that they cook well. Well-seasoned! It just requires a light sprinkling with flour or even bread crumbs besides a pinch of salt and pepper. Apply sparingly on your target food and get those boosting flavors. Mind the cooking time. As usual, haddock takes less time to cook, so you must be cautious either with your stove or oven. It should probably take about 15-20 minutes to fully cook the fish, depending on which cooking method is employed. So, cook it and try to focus on the time to get something rather tender. With that out of the way, here are three lovely methods of cooking haddock and fully enjoying it. Haddock Broiled Broiling is the right way to prepare this fish. You can reap a crunchy, mouth-watering contrasting dish in benefit. Prepare the haddock by rinsing then pat the surface dry with a paper napkin. This causes the chips to cook equally all around and, equally as important, get a great crispy finish. Dredge: Dust the haddock lightly in the flour so that the crust is fine. Cook — They should be brushed with salad oil while preparing fish. Place in a very hot broiler or the rack set on a broiling pan. Broil for a few minutes with the fish being flipped once. Fry on one side, then flip over and fry each side until golden brown and pleasantly crisp. This takes about 8-10 minutes, depending on thickness. Accompany: Serve it with spaghetti in anchovy sauce-more saline flavor will balance the neutrality of this fish. Haddock Baked If you fancy great creamy baked haddock, this will work out nicely. Here’s a rough idea of how to achieve such greatness: Clean and Prepare: Wash and peel the skin off the haddock. Be careful while doing it, and then marinate it in vinegar for 15 minutes to soften its meat a little. Letting the fish dry is important before it is covered with flour. Dip into a beaten egg, then coat with breadcrumbs so that you can achieve that outside golden texture. Baking: Pass the fish through butter to grease and then spread melted butter on the fish for the added measure of depth. Place in a preheated oven at 400F (200C) for about 20 minutes, meanwhile making sure that it has turned golden brown and has cooked. You can insert a fork into the fish to see whether the fish is done or still not done. Other additives: gravy and garnish — This is, however, the tasty pan gravy formed while baking cannot be overlooked. Such gravy is best prepared and seasoned to personal preference. Better serving with freshly cut lemon slices to promote your fish’s taste. Haddock Curried Feel like making it a little bit hotter? A curry sauce is your secret key to transforming haddock into an exotic-tasting food your guests will remember. This recipe calls for small whole haddocks. Wash the fish, cut it, de-bone it, and discard the head. Slice into thin, bite-sized fillet pieces. Flour and Fry: Dust the fish with seasoned flour, then fry until it’s crisp and golden brown. Keep aside. Curry Sauce: In a pan over low heat with butter, melt chopped onion and apple until translucent. To thicken, stir in the flour and pour in a good dash of salt, pepper, and curry powder. Pour in the stock and bring to a reduction to the amount of your desire. Now, place the fried haddock in the curry sauce. Warm through. Position the fish with sauce right in the middle of the dish. Questions about the Cooking of Haddock: How long do you bake haddock at 200 °C? Bake at 400 °F (200 °C) for roughly 15 to 20 minutes. This should, however, be remembered that wherever the setting is at, your haddock fish cooking time will always be governed by the size and thickness of the fillets. This one will tell you if the fish is done if it can be easily flaked with a fork and has lost its transparency. The last few minutes of broiling make a difference in making the food crispy. How should haddock be prepared to be consumed? As we mentioned in this post, Haddock can be cooked through broiling. This will give a brown and crispy layer on the outer side while the fish is still moist inside. Roasting enhances its taste – much more with butter or breadcrumbs; frying with seasoned flour and curry sauce for that risky taste! © 2024 bestcarving.com
How to cut and serve fish (Salmon, Cod, Haddock, and more!)
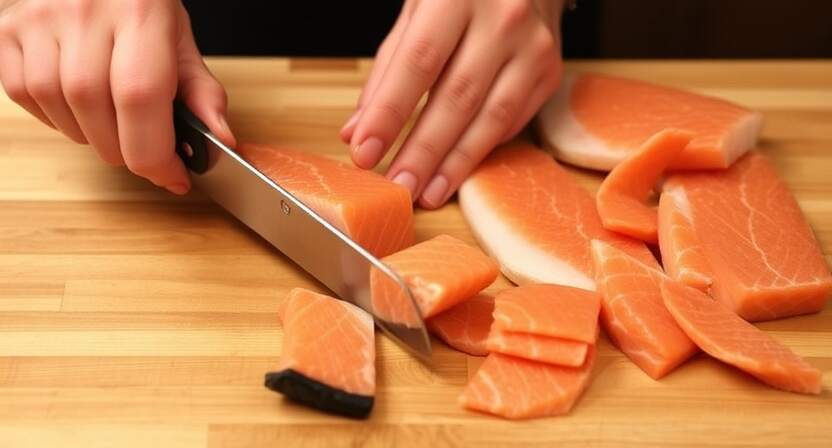
Best Carving Food Carving Fish and SeaFood Chicken Appetizer How to cut and serve fish (Salmon, Cod, Haddock, and more!) Ladies are taught that a broad silver knife is the correct utensil for handling fish. As little of the bone as possible has to be presented, and the flakes cannot be damaged. Halibut or Salmon Put a middle cut, which is a thick piece of halibut or salmon on the plate, with its skin side up and the back of the fish to the furthermost side of the dish. Trim large slices nearest the bone, insert the blade under, and lift out the slices. Then remove the bone and in the same way, prepare the remaining part of the fruit loaf. Spoon a thin slice of halibut onto the plate and skin side towards you. Slash through it just above the adjoining bones and pull the fish apart, if needed, leaving the bone on the plate. Mackerel and White Fish Thin fish like mackerel, white fish, and other fish for broiling should be slashed along the operator’s line. Instead, peel them in halves along the length and then into the slices that are preferred. Pray to ensure you do not crack or crumble them. Whole Smelts, Perch, and Other Small Pan-Fish Whole Smelts, Perch, and other small panfish are typical of this preparation method. They should lie head and tail down next to each other. If the sauce is served in a silver cup placed in the middle of the dish, your fish must be placed around the cup. Or, put two or three on a silver skewer and give one to each person. Small pieces and rolled fillets of fish are not cut. Baked Fish Cod, Haddock, Cusk, Bluefish, Shad, Small Salmon, and Bass. When these fish are served whole, they can be cut better if they are prepared in the following way before cooking: Broad, short fish like shad can be propped up using stale bread or peeled potatoes to keep them steady. Longer, narrower fish can be shaped into an “S” and secured with skewers or string. For trussing, use a sturdy string and thread it through a needle. Push the needle through the fish’s head, then tie the string securely. Then bend the head around and pull the needle through the middle of the body. Bend the tail in the other direction, push the needle through near the tail, pull the string tight, and tie it. Cut the skin two inches apart on each side. Fish prepared this way will hold its shape until served. Place it on the plate with the head on the left and the curved side facing outward. Slice along each side of the backbone, running your knife the full length of the fish. Then cut through the cuts on the side closest to you and move each piece away from the bone. After that, take off the part of the fish that is on the far side of the bone. Lift the bone to get to the stuffing, and give each person a little bit of fish, stuffing, and sauce. The skeleton should remain intact on the plate. If the fish was baked whole and served lying on its side, start by cutting slices across the body down to the backbone—but avoid cutting through it. Use the knife to slide under each portion, lifting the meat gently off the bone. Serve the portions as needed, ensuring they stay intact. Once you’ve removed all the top fillets, take out the backbone and cut the bottom section into portions. © 2024 bestcarving.com
Five Lobster Recipes You Can Try and Enjoy!
Best Carving Food Carving Fish and SeaFood Chicken Appetizer Five Lobster Dishes You Can Try and Enjoy! Lobster à la Crème Use a freshly killed lobster, remove its meat gently, and leave its shell whole, cutting it into little pieces. Mix a teaspoonful of salt, a little pepper, a dash of nutmeg, a tablespoonful of vinegar, and an ounce of butter in a thin batter in a saucepan. Simmer gently for ten minutes, stirring constantly. Slowly add two tablespoons of stiff enough whipped cream, stirring till it is smooth. Replace the mixture in its lobster shell, cover with breadcrumbs, and burn in a quick oven. Serve in a folded napkin with a little parsley scattered over it at the top. Lobster Cutlets! Boil a large lobster for five minutes, then break its shell, and remove its meat gently in big chunks. Cut its meat to a quarter of an inch thick. Dust each one in beaten egg, then in crumbs, and top with salt and pepper. Fry them for five minutes in hot fat till they turn golden. Serve them in a little heap of mashed potatoes in a plate, with a circle of cutlets in a circle around it. Serve with a dish of oyster sauce alongside it. Lobster Patties Boil a lobster for 15 minutes, then break its shell and cut its meat into tiny morsels. Melt an ounce of butter in a saucepan and add one tablespoonful of cream and white stock. Stir in a teaspoonful of anchovy extract, a little seasoning to your taste, and a fistful of dried bread crumbs. Boil the mixture in a quick boil. Prepare patty pans lined with puff pastry, taking care not to make it too thin. First, place a small piece of bread in the middle, then a top cover of pastry. Bake till it turns a pretty gold color. Remove the cover, discard the bread, fill with warm lobster mixture, and cover with pastry cover. Serve at once when warm. Lobster Salad For the salad, use sweet lobster, boil for 20 minutes, and cool down. Break the shell gently and remove the meat in big chunks, if possible. Set aside the coral for garnishing. Break the meat into little pieces add salt, pepper, and a dash of vinegar for each piece. Chilling and Preparation: Obtain two crunchy, dry heads of lettuce with white, firm centers, and wash them thoroughly. Break the lettuce and use it in a dish, and then a layer of seasoned lobster, and go on piling ingredients in layers till all have been utilized. Dressing: Dress with dressing and garnish with coral when about to serve salad. For a pleasing appearance, have thin wedges of egg, beetroot, nasturtium flowers, and radishes over parsley sprigs. How to: Use two egg yolks and beat them till thick, and add a little salt, half that of pepper, and a dash of mustard. Add, beating till smooth, a slow drip of a half-pint of oil and two tablespoons of vinegar, one at a time. Lobster Butter and Sauce Lobster Butter: To make lobster butter, use hen lobster coral and roe, freshly boiled, and mix with twice its proportion of fresh butter and a dash of cayenne pepper. Beat till it is smooth and scarlet in hue. Put in small, tight saucepans and store in a cool location for future use. Lobster Sauce: Melt a little butter first to make a basic sauce. Next, add chunks of lobster meat and one to two teaspoons of processed lobster butter, stirring lightly. Avoid boiling sauce when adding in lobster butter, for it will become yellow in color. To make it brighter, squeeze a little lemon juice in. © 2024 bestcarving.com
Oyster Lover’s Feast: Five Must-Try Recipes

Best Carving Food Carving Fish and SeaFood Chicken Appetizer Oyster Lover’s Feast: Five Must-Try Recipes! Treat your taste buds to a seafood lover’s feast! Oyster Lover’s Feast will put on five irresistible recipes featuring this ocean treasure. Be comforted with the classic comforting, gourmet delights, and sure-to-satisfy cuisine in each one of these. So let’s dive into that feast! Oyster Stew: A Comfort Food Classic Stew the oysters in a porcelain kettle with very little cold water. Stir it lightly, heat it slowly, and skim off all the foamy scum that rises to the top, so that your broth may be clear and bright. Add one cup of hot milk, thickened with one tablespoon of flour and one of butter stirred in. Season with salt and pepper to taste. Serve the stew steaming hot in a briny comfort bowl. Oyster Patties: Delicate and Decadent Make a flaky, buttery pie crust and roll it out. Take a biscuit cutter to create rounds, joining two rings for each base crust. For the filling, heat one quart of fresh milk, ½ cup of butter, and a pinch of salt and pepper in a pan over simmering water. Add liquid from a quart of oysters to create more depth. Slowly pour in one tablespoon of cornstarch, which has to be mixed with cold milk before preparation; cook until the content attains a cream-like level of consistency. Add the oysters and stir gently until they are heated. This mouth-watering filling can now be filled into ready pie shells topped with a flaky pastry and served red hot enough to tempt. Fried Oysters: Crispy, Golden Perfection Take the cracker crumbs, crush them to a very fine consistency, and mix with a pinch of salt and pepper, adding a handful of this flour for an extra crispy crust. Dip each oyster in it liberally, shape it in patty form, pressing crumbs well onto the surface. Heat oil or fat in a skillet hot; fry these patties quickly in it to a golden brown. Keep an eye out when oysters are fried to perfection, they are crunchy on the outside and soft within for a truly heavenly bite. Oyster Loaf: A Real Crowd-Pleaser Cut off the top of a loaf of bread that has been baked in a slow oven until nicely browned. Scoop out all but about ½ inch thick crust from the bottom and sides. Prepare a very rich oyster stew, slightly thickened. Fill the hollow loaf with rich stew, laying alternately scoops of stew and breadcrumbs. Replace the top bread, brush the top of the loaf with beaten egg yolk, and bake in a very hot oven until golden and heated through about 10 minutes. Cut through crunchy, flavorful layers to reveal a dish almost too pretty to eat, but trust me, it’s worth it! Escalloped Oysters: Ideal in a Dish Place a layer of oysters in a deep baking dish. A thick layer of bread crumbs, buttered with a dash of salt and pepper for added flavor. Small chunks of butter in each layer for added richness. Small chunks of butter are placed at the top for a rich topping. Stack them high, with a lot of crumbs and a little added butter at the top. Pour oyster liquid over the dish, letting it soak in but keeping room for crumbs to expand. Bake until golden, checking halfway, if the dish appears dry, drizzle a little milk and pop it back into the oven to bubble and heat perfectly. Serve hot from the oven for a comforting, classic warm treat. From rich bakes and crunchy fried foods to tasty bread and creamy stews, these recipes for oysters will wow your guests. For a party, family dinner, or a cozy night in, they add a fun touch and a little ocean presence to your meal. Savor each flavorful bite of ocean-inspired pleasure! © 2024 bestcarving.com
Crab Recipes to Spice Up Your Table!
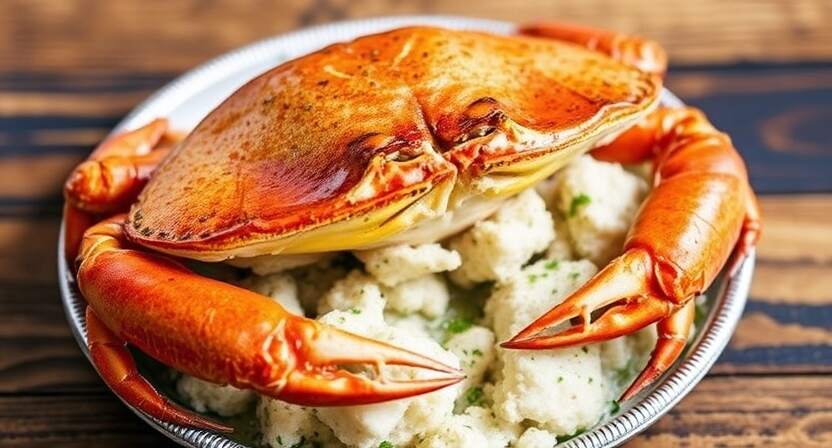
Best Carving Food Carving Fish and SeaFood Chicken Appetizer 3 Crab Recipes to Spice Up Your Table! Choosing the Right Crab When picking a crab, opt for ones with a rough shell and claws—they’re usually the tastiest. Shake the crab; if it rattles, it’s a sign it may be too watery inside, so steer clear. Look for a bright red shell and clear eyes. When extracting meat, leave out the portion near the head since it’s not suitable for eating. Hot Buttered Crab Remove the meat from the crab shell, mix it with half its weight of breadcrumbs, a pinch of pepper, salt, grated nutmeg, a spoon of salad oil, and the same amount of vinegar. Clean the crabshell of any waste, fill it with the mixture, and sprinkle some breadcrumbs on top. Add a knob of butter and bake for about ten minutes. Serve with hot, dry toast for a delicious bite. Crab Salad Flake the crab meat and arrange it in the center of a serving dish, keeping the claws on top as a decorative element. Surround the crab with shredded lettuce and watercress, then pour a light salad dressing over everything. Simple, refreshing, and delicious! Crab Soup (Potage Bisque) For a delightful and delicate soup, choose a heavy crab, then shred the meat from the claws. Pound the soft meat from the body with half as much boiled rice in a mortar. Thin this with a bit of clear stock and strain through a colander. Place the mixture in a stewpan with enough stock (veal stock is recommended) to reach your desired consistency. Stir in a cup of thickened cream, salt, and a hint of cayenne pepper. Let it come to a single boil, then remove from heat and add the shredded claw meat. Sweeten its color with a little lobster butter. © 2024 bestcarving.com
How to Cook Cod: 7 Delicious Ways to Prepare Cod Fish
Best Carving Food Carving Fish and SeaFood Chicken Appetizer How to Cook Cod: 7 Delicious Ways to Prepare Cod Fish Baked Cod To prepare a simple yet delicious type of cod through baking, one needs to take a three-pound piece of cod from the middle of the fish. Take a forcemeat of breadcrumbs, minced parsley, thyme, seasoning, and yolk of an egg. Fill that inside the fish and sew it to keep that inside. Place in a baking dish the stuffed fish surrounded by sliced carrot, turnip, and small onion. Pour on the fish a spoonful of vinegar, and place above two or three lumps of butter; bake until the fish is done – about 20 minutes. Take out the vegetables, but serve with the fish the boiling liquid that has formed in the dish instead of sauce. Cod Fried à la Maître d’Hôtel Give your fried cod class with this elegant recipe featuring crispy fish in sharp aromatic sauce. Begin by taking two or three thick slices of cod. Soak the slices in salt water for 30 minutes. Remove from water and pat dry with clean kitchen towel. Prepare the flour with seasoning: Place the flour on a suitable container and mix it with salt and pepper. Dip each slice in the prepared flavored flour, making sure each gets a good coating. Fry slices of cod in plenty of oil or fat in a large deep pan until it is hot and shiny until golden brown; this only takes a few minutes. To serve: On a warmed serving dish, place the fried slices in an orderly little pyramid. Now, for your Sauce Piquante-sharp sauce accompanying your cod: Melt the two tablespoons of butter over medium heat, allowing it to shimmer and slightly bubble in a small saucepan. Add two fresh, chopped tablespoons of parsley and half an ounce of flour in the bowl, whisking continuously until one fine, silky sauce practically begs to be poured onto whatever entree desired. Season liberally with salt and pepper, allowing the flavors to meld together in perfect harmony. Stir in a tablespoon of vinegar to inject into the mix a zesty, tangy kick that will brighten up the sauce and lift the entire dish. Then add a splash of water at any time, if needed, just to thin it down to a creamy, pourable consistency. Let it boil up for a few moments until flavors combine in a harmonious richness and zest. Once ready, immediately drizzle the piping hot vibrant sauce artfully around the crispy fried cod, turning this into a visual and culinary masterpiece. Serve it at once and enjoy the satisfying crunch of the cod balanced with the lively tang of the piquant sauce. A dish this divine is best savored one luscious bite at a time. Two Tasty Recipes for Cod Fish: Creamy Cod – Cod à la Crème A very creamy cod dish made with either leftover boiled cod, or fresh cod. If using fresh, of course boil the cod first until it becomes tender. Break the fish into flakes and remove the skin and bones. Take a pint of milk in a saucepan; add to it one teaspoon of salt and lemon rind. Boil it and pour out into a basin. In the same saucepan melt an ounce of butter, stir in an ounce of flour to make a smooth mixture. Put in a little cayenne pepper. Put in the milk gradually, stirring all the time and boil the whole up until thick. Put in the cod flakes in this sauce and heat through. When this is hot, place it on a hot dish, sprinkle tufts of parsley over the top, and serve slices of toasted bread on the side with which to dip into the sauce. Curried Cod If you have some boiled cod left over, curried cod is a delicious way to use it. Flake the cod and give it a quick fry in butter. Just enough to heat it through, then set it aside, on a warmed plate. In the same pan melt an ounce of butter and add two sliced shallots in, along with a small diced apple. Sauté until they are golden and fragrant. Add one tablespoon of flour, half a teaspoon each of curry powder and salt, and a pinch of cayenne pepper-according to taste. Stir in gradually a teacup of stock; continue stirring until it thickens, making a smooth sauce. Return the cod flakes to the pan, reheat all gently, and serve hot. This is great with a border of boiled rice arranged around the edges of the serving dish. Salted Cod with Parsnips Two pounds of salted cod soaked in water for 24 hours, changing the water sometimes. Soaked cod: drain and put it into a pot of cold water-fresh; from cold bring it gradually to a simmer and let it remain till it is quite tender, but never boil, or it will be tough. Drain the cod and put it into a hot serving dish. Garnish with boiled parsnips cut up to bit-sized lengths and pour over all a nice egg sauce. Egg Sauce: Put half a pint of milk into a saucepan and boil up with a little flour to thicken. Add a small knob of butter, a seasoning of salt and pepper, and one lemon’s juice. Mix in well two hard-boiled eggs, chopped up very fine. Stir the sauce well out before covering the cod and parsnips with it. Sprinkle fresh parsley on top. Salted Cod Mousse: First prepare the salted cod by soaking and cooking it as in the preceding recipe. Drain it well and break it into small flakes. In a little butter sauté a slice of Spanish onion until softened but not browned. Scald the white inner crumb of a slice of white bread, mash it to a paste with a fork and combine it with the onion. Gradually add a cup of fresh milk, stirring continuously with a
How to Cook Fish: Tips and Techniques for Perfect Results!
Best Carving Food Carving Fish and SeaFood Chicken Appetizer How to Cook Fish: Tips and Techniques for Perfect Results! Cooking fish can be so easy and pleasurable once you know what to watch out for. Take this guide along for some handy tips on the right way to prepare, cook, and serve your fish. 1. Choosing Fresh Fish When it comes to fish, one factor makes all the difference: freshness. Here’s how you tell: Gills: They are a bright, deep color. Clear eyes: Fresh fish have their eyes full and shiny, not cloudy. Firm texture: Press the flesh gently—it should spring back at once. While smell is not always a measure of freshness, those who fail these tests are certainly less appealing to cook. 2. Cleaning and Preparing Your Fish Scale or skin some fish; the sooner after catching, the better. Fishes with hard or dry scales may be slightly moistened in cold salted water or momentarily dipped in boiling water to facilitate scaling. Open the fish as little as possible to enable it to retain its shape, particularly when stuffing. Remove intestines, gills, and congealed blood. Avoid washing too much after having made an incision in the flesh to preserve natural flavors. A quick rinse under salted water will do. Wipe the fish dry with a clean towel always before going ahead with cooking procedures. 3. Preparing Fish for Special Cooking Techniques For Baking or Boiling: When cooking fish whole, take care not to break the liver from the roe as you open it. Scrape it well, let it dry, and cut off the fins if it is important. In the event of poaching, fold the cheesecloth around the fish so that the fish does not lose its form. Broiling: Slit the belly open with the knife making sure you remove the backbone unless very small. This allows even cooking and more flavor. Use a hot griddle or double broiler, cooking the flesh side always first. Brush with butter or cream for extra richness. For Frying: Fish is fried whole, as steaks (slices crosswise), or as fillets (slices lengthwise). Dry fish before frying. Dredge in flour, cornmeal, or crumbs for a crispy coating. Fry in hot, deep fat or lard. Lard does not only give crispiness to the fish but also a nutty flavor. Sauté: This cooking technique uses a very small amount of fat, just enough to grease the pan. It is best suited for quick cooking and for a few portions. 4. General Cooking Tips by Method Broiling: Broiling is quick and delicious and allows the flavors of the fish to be locked inside. Heat up your skillet or broiler and lightly coat with seasonings or butter for added flavor. Boiling or Steaming: Typically reserved for certain fish only, boiling is made tastier by relying on strong sauce additions. Steaming is a much better way than boiling because flavors and nutrients are not destroyed. Baking: To broil fish evenly and nicely, prop it up on the platter. If necessary, stick skewers or potatoes in as braces. For a long, thin fish, secure the tail to the mouth to form a crescent. 5. Basic Frying Tips For a crisp crust, fry in fat hot enough to brown bread in 30 seconds. Season while frying, not before. Use a little salt to allow the natural flavor to predominate. Fry fish in batches to avoid crowding and even steaming. 6. Presentation and Flavoring to Perfection The secret of good fish cookery lies in preserving or developing the natural flavor of the fish. If the fish has a delicious flavor, bring it out with light seasoning. Where the taste is unsatisfactory, use marinades, herbs, or spices and add extra interest to the dish. Serve your fish at its best-golden, even cooking, and garnish, if desired. Follow these tips, and you’ll be off to creating recipes that please the palate just as they do the eye. Now, go forth with confidence and dive deep into your fish recipes; let the cooking begin! Here are some of the basic methods and handy tips that enable you to grill fish like a pro. Grilling: Bringing Out the Depth of Flavor Fire Concerns: You need a hot, clean fire when grilling fish. Charcoal is great, and with some damped coals or a “braisière,” a charcoal stove will provide you with consistent heat that works. Special equipment: Keep a gridiron just for fish, so you won’t be transferring old flavors from other foods that have been barbecued. Clean and dry it always after use, and lightly oil the bars before cooking so that the fish won’t stick. Handle with care: If your gridiron is not double-sided, use sugar tongs instead of a fork to turn the fish over. It keeps the flesh tender. Pro Tip: Grilling develops the inherent flavor in this fish. For kicks, slice and fillet a fresh mackerel, slap it onto a grill and discover a flavor quite hard to beat. Cooking En Papillote: A Delicate Approach Be Generous With the Butter: Even though cooking fish en papillote, in paper with butter, traps flavor and keeps the fish moist, do not be stingy with the butter! A little pat won’t do. Paper Wrapping Safety First: Cooking in paper, heat high but controlled. Prevent flare-ups that will set the paper afire. Serve with flair: fish to be served still in its wrapping for a rustic, elegant presentation, using plain white paper – no printing. Boiling Tips: To Retain Flavor and Freshness, To begin with, salt is needed in the water. For large fish use slightly more than ½ pound of salt to the gallon, for small fish slightly less than ¼ pound. Begin gently: Place fish in almost boiling water and bring slowly to a boil. This closes flavor in, as it does with boiled meat. Lemon trick: Boil white fish with lemon juice rubbed on it. Court-bouillon magic: Freshwater fish or cold fish must be boiled in “court-bouillon” to extract the blandness. Recipe: Take 1 part vinegar, 1 part red wine and 4 parts water. Add salt, pepper, herbs, sliced onion, and a carrot. Put a small piece of bacon in it if you so desire. Frying Crispy – golden perfection Fat is your friend: when frying, fish should be completely submerged in hot fat. The fire doesn’t need to be slow and smoke; plenty of fat is needed-it does not go to waste! After use, fat can be strained and re-used to as many as 50 times. Temperature is everything: Fat is ready when it is completely still, when pale blue steam rises off of it. Preparation: dust dry fish, coat with beaten egg, and roll in brown breadcrumbs or raspings to give a crumbly coating. Greaseless finish: place fried fish on blotting paper to take out excess grease. Baking: Well-cooked Fish Au Gratin Layer flavors: Commence by placing some breadcrumbs mixed with butter and herbs in the bottom of a well-smothered baking dish. Place the fish in it & top with the breadcrumb-herb mixture + more seasoning & dots of butter on the fish. Optional extra: A splash of vinegar adds flavor Presentation: Au gratin dishes are served in the same dish they’re cooked in. Buy one good quality heat-resistant material gratin-dish to achieve the same outcome every time. Preparing Salted Fish Soaking and rehydrating: Allow salted fish to soak in water for at least 24 hours before using, changing the water several times. Then drain and dry well before cooking. Takeaway Tips for Success in Cooking Fish! Always use fresh, high-quality fish-it makes a world of difference. Handle fish gently, as it is a delicate protein that is easily spoiled. You can supplement those natural flavors with herbs, butter, and/or marinades. The more fish you cook the more you will hone your sense of how long to cook it using what method. © 2024 bestcarving.com
How to Cook Salmon Fish: Step-by-Step to Perfection in Tenderness
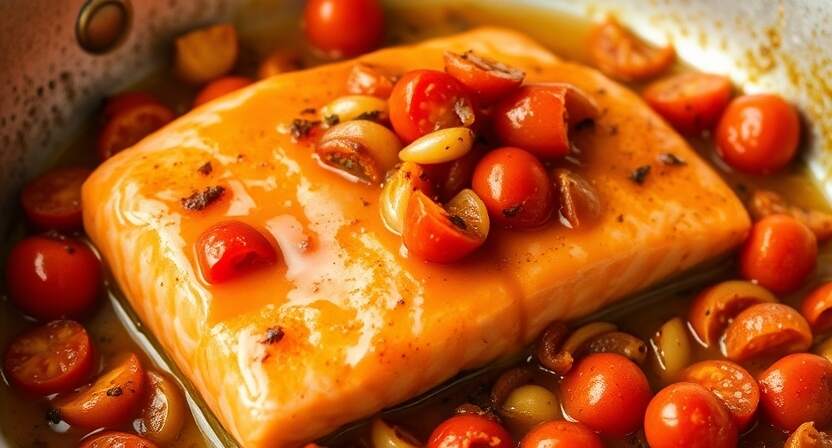
When boiling salmon, use cuts with a small head and thick shoulders because such cuts yield better texture. Whenever buying only a portion, try to get the head-and-shoulder piece or preferably one from the middle, as such cuts ensure uniformity in cooking…